
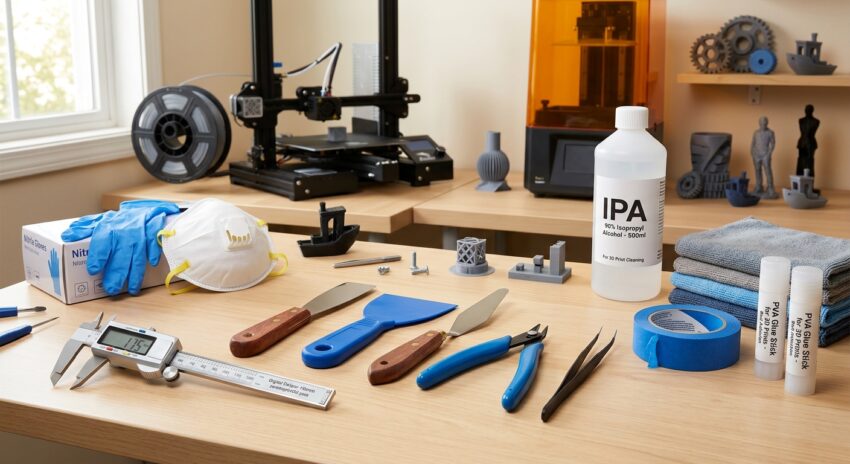
Unboxing a brand-new 3D printer is one of the most exciting moments for any maker. You assemble the frame, level the bed, and launch your very first test print. But as soon as that print finishes—or when a layer shifts mid-print—you quickly realize a crucial truth: a 3D printer alone is only half of the equation.
While most manufacturers include a couple of basic hex keys and a cheap wrench in the box, they rarely provide the tools you need to clean, calibrate, post-process, and maintain your setup.
Whether you are running an FDM or a Resin machine, having the right gear on hand from Day 1 will save you hours of frustration, prevent damaged build plates, and turn messy print failures into smooth recoveries. Here is the ultimate beginner’s guide to building your essential 3D printing toolbox.
1. Removal & Part Scraping Tools
Once a print finishes, it is fused to the build platform. Removing it safely without damaging the part or scratching your build plate requires the right scraping tools.
- Spatulas & Bed Scrapers: A thin, flexible metal spatula is essential for lifting rigid prints off smooth glass or spring steel beds. For textured or PEI coated beds, plastic scrapers or rounded edge spatulas are preferred to prevent scratching the coating.
- Palette Knives: Extra-thin painter’s palette knives can easily slide under the corner of a stubborn print to break the vacuum seal without applying excessive force.
Pro-Tip: Never push a sharp spatula toward your hands or body. Always angle the scraper away from yourself to avoid painful slips.
2. Precision Cutting & Cleaning Tools
3D prints often come off the bed attached to support structures, brims, or thin plastic strings (stringing).
- Flush Cutters (Side-Cutting Pliers): These are arguably the most used tool in any 3D printing setup. Unlike standard pliers, flush cutters have a completely flat backside, allowing you to snip support pillars, zip ties, and filament strands flush against the surface of your model.
- Precision Tweezers: Long, angled tweezers are vital for grabbing oozing filament from the hotend nozzle right before a print starts without burning your fingers.
- Deburring Tool & Hobby Knife (X-Acto): A rotational deburring tool smooths out rough edges left by brims on bottom layers, while a sharp hobby knife precision-trims tiny imperfections and support nubs.
3. Bed Adhesion & Surface Preparation
Getting your first layer to stick properly is the single most important factor in preventing print failures.
- Glue Sticks & Bed Adhesion Promoters: A standard PVA glue stick works wonders in two ways: it helps PLA stick to stubborn beds, and acts as a release agent for materials like PETG or TPU that might otherwise bond too permanently and tear your bed surface.
- Painter’s Tape (Blue Tape): An affordable, low-tack option for covering glass beds to improve adhesion for challenging filaments.
- Hairspray (Unscented / Strong Hold): A quick, light mist on glass or PEI plates provides an even adhesive layer for large prints prone to warping.
4. Maintenance, Cleaning & Solvents
Keeping your build plate and mechanical components clean guarantees consistent print quality over time.
- Isopropyl Alcohol (IPA – 90%+ Concentration): Oils from your fingers on the build plate will ruin first-layer adhesion. A quick wipe down with high-concentration IPA removes grease and dust before every print. (For Resin printers, IPA is mandatory for washing uncured resin off parts).
- Microfiber Cloths: Lint-free microfiber cloths ensure you clean your build plate without leaving behind fibers that could interfere with printing.
- Nozzle Cleaning Needles / Guitar Strings ($0.4\text{ mm}$): Thin steel needles are designed to clear nozzle clogs from the bottom up using the “cold pull” or manual push technique.
- PTFE Lubricant / Machine Oil: Keeps Z-axis lead screws, linear rails, and smooth rods running smoothly without attracting excessive dust.
5. Measurement & Calibration Gear
3D printing requires exact precision. Relying on visual estimation will eventually lead to dimensional inaccuracies or extrusion issues.
- Digital Calipers: An absolute must-have tool. Digital calipers allow you to measure filament diameter (to verify 1.75 mm consistency), calibrate E-steps, measure wall thickness, and check dimensional accuracy against your CAD models.
- Feeler Gauges or A4 Paper: Used for manual bed leveling to set the exact distance between the nozzle and the build surface.
6. Personal Protective Equipment (PPE) & Safety
Safety should never be an afterthought, especially when dealing with high temperatures, sharp tools, or chemical solvents.
| Safety Item | Recommended For | Primary Function |
| Nitrile Gloves | Resin & Chemical Cleanup | Protects skin from toxic liquid resin, IPA, and harsh solvents. |
| Safety Goggles | FDM Support Removal & Resin | Prevents flying support fragments or resin splashes from hitting your eyes. |
| Respirator / VOC Mask | Resin & ABS/ASA Printing | Filters out toxic Volatile Organic Compounds (VOCs) and chemical fumes. |
| Heat-Resistant Gloves | Hotend Maintenance | Protects hands when changing nozzles or touching hot build plates (200C). |
Essential Toolbox Summary Checklist
Before launch day, make sure your workbench is stocked with these essentials:
- Flush Cutters (Side Snips)
- Thin Metal / Plastic Scraper
- Isopropyl Alcohol (IPA 90%+) & Microfiber Cloths
- Digital Calipers
- PVA Glue Stick
- Precision Tweezers & Nozzle Needles
- Nitrile Gloves & Safety Glasses
Having this toolkit beside your 3D printer ensures you are ready for any situation—whether it is prepping a build plate, removing intricate supports, or performing routine maintenance!